Family how to: chalk printing
Family how to: chalk printing
By Lily McGuire and Tiffany Greenoak
Published 1 September 2020
Try these two simple techniques and experiment with using chalk to make colourful abstract prints.
-
How-to: chalk printing
Looking up at the clouds
Like many artists throughout history – from Claude Monet to J.M.W Turner and James Turrell, we’ve been inspired by the effects, colours and patterns made by clouds in the sky. What does the sky look like where you are?
You can see some paintings of skies in our current exhibition Gauguin and the Impressionists, or try typing the word ‘sky’ into our Collection search engine.
-
-

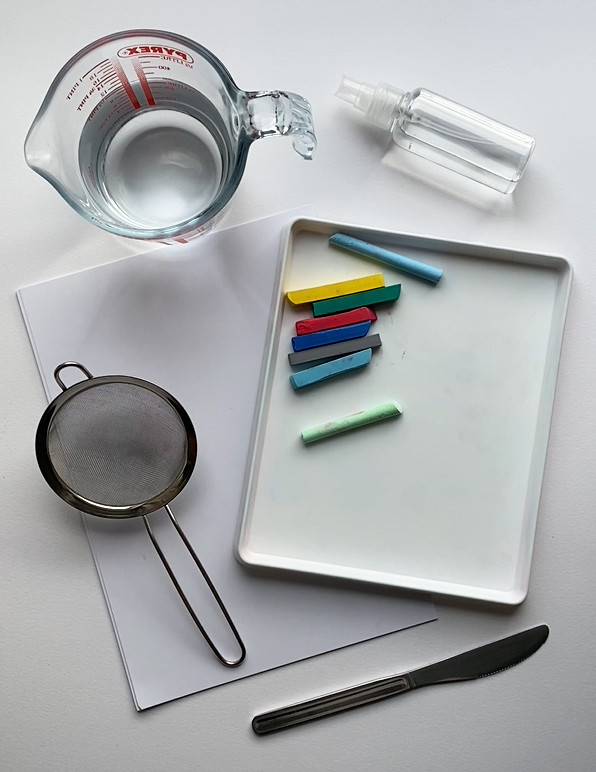
What you need
• Thick paper or card
• Water
• Chalk or soft pastels
• Tray
• Spray bottle
• Sieve or grater
• Knife
-
-
-
Step 1
Go outside and take a look at the sky. What colours and patterns can you see?
-
Step 2
For the first printing technique — start by filling your tray with water.
-
Step 3
Choose colours that match the sky where you are. Regular chalk will give a lighter effect, where soft pastels will be brighter and bolder.
-


-
-
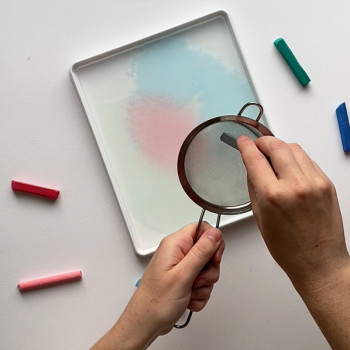
Step 4
Using a sieve, grate your chalk into the tray of water. Make sure to lightly dust the colour across the waters surface, making sure it doesn’t collect in a pile or sink to the bottom.
-
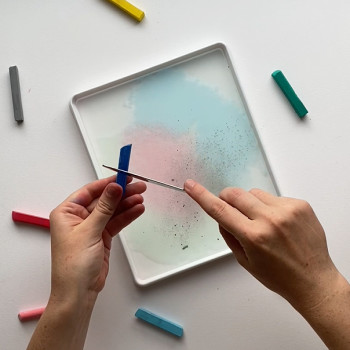
Step 5
Now try using a knife, scraping the chalk against it. This will create larger flecks of colour.
-
Step 6
To make a print, bend your paper and slowly lower it into the water. Allow the middle to touch the waters surface first, and try not to submerge it.
-
-
-
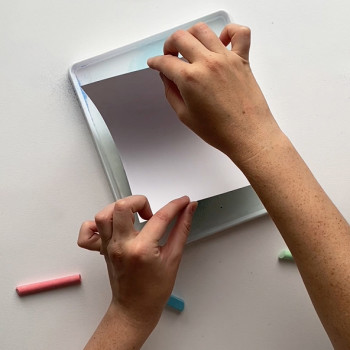
Step 7
Lightly hold the paper in place on the waters surface for 30 seconds.
-
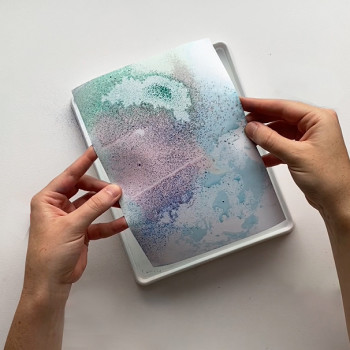
Step 8
Gently peel the paper away from the corners, turning it over to reveal the print. Let any excess water run off into the tray.
-
Step 9
For the second printing technique — start by lightly spraying your tray with water. This will stop the paper curling away from the tray.
-


-
-
Step 10
Place the paper down and lightly spray it again with water.
-
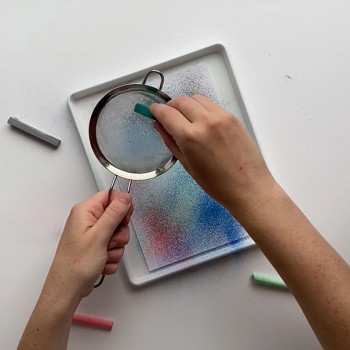
Step 11
Grate and scrape the chalk directly onto the paper, spraying it with water as you go to make the colours merge and run.
-
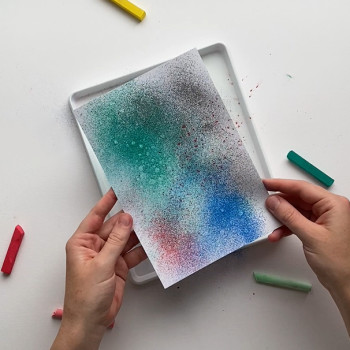
Step 12
Pull your print away.
-

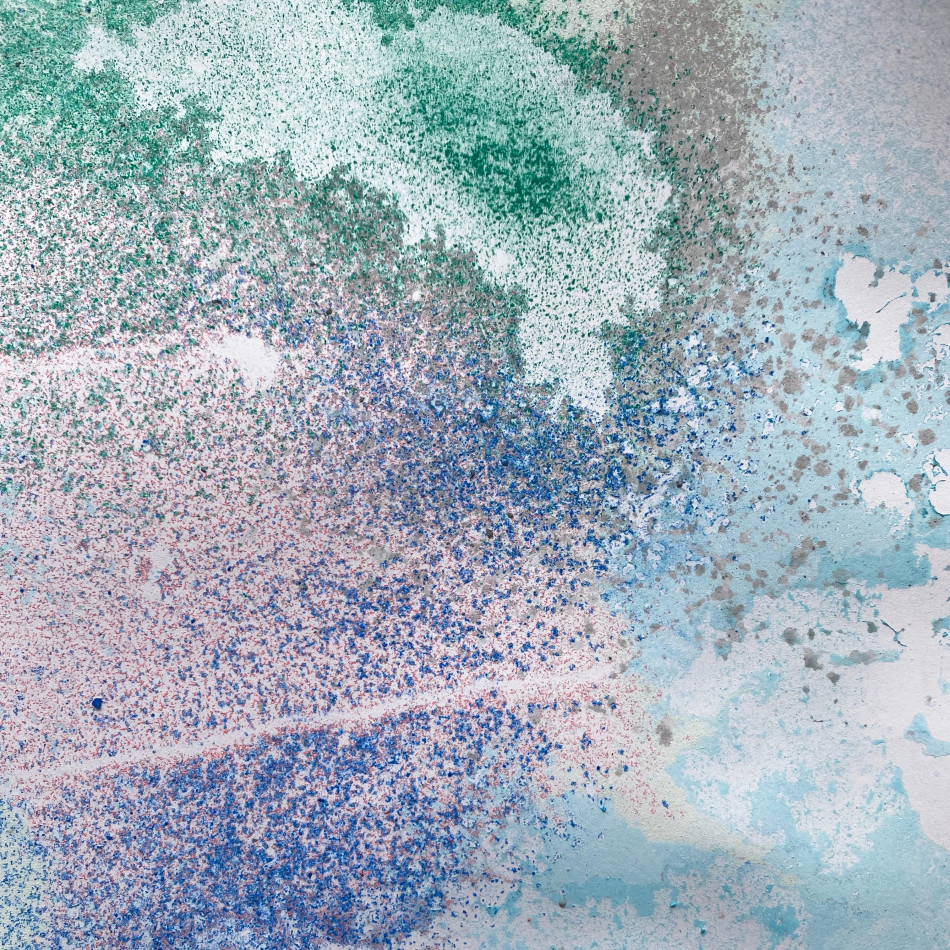
-
Admire your prints!
-
Show us your prints! Share a photo of your finished work with @royalacademy on Twitter or @royalacademyarts on Instagram, using #familyhowto.
-
-
Families at the RA
Whether it’s a free drop-in workshop or one of our fun and engaging Art Detective trails, the RA is brimming with colourful paintings and sculptures that are waiting to be explored. Everyone is welcome at the RA – and kids under 16 go free to all our exhibitions.
-

-
Support the RA
An independent charity, we receive no revenue funding from the government. At this difficult time, we're reliant on the support of our Friends, visitors and online audiences. Thank you.
Read more
-
RA Exhibitions
1 month ago
Video: introducing ‘Entangled Pasts, 1768–now: Art, Colonialism and Change’
Artist Lubaina Himid RA talks to us about our next exhibition in the Main Galleries.
-
Artists
3 months ago
My sketchbook: colourful drawings by Bob and Roberta Smith RA
Take a look inside the sketchbook of Bob and Roberta Smith RA and learn how to create a visual poem.
-
Artists
3 months ago
Video: Catherine Opie on photographing leading British artists
Catherine Opie discusses her portraits of David Hockney, Anish Kapoor, Gillian Wearing, Isaac Julien and Lynette Yiadom-Boakye, featured in our free display in the Collection Gallery.
-
Inside the Academy
3 months ago
Video: new posters on display
Watch our team refresh our iconic Poster Bar for the first time since 2018, featuring 21 new posters from our past exhibitions.