Family how-to: make a drawing sculpture-bot
Family how-to: make a drawing sculpture-bot
By RA Learning
Published 18 November 2016
Inspired by Abstract Expressionist sculpture, here’s how you can make a sculptural robot that can move around and draw all by itself!
-
Extra inspiration!
The project is inspired by the Abstract Expressionist movement and idea of abstract “automatic” drawing – the technique of free, expressive doodling to tap into the subconscious. During the activity, children can also learn the basics of using a motor and safely making an electrical current. If you can, have a look at the welded metal sculptures by David Smith in the Abstract Expressionism exhibition. Some of his sculptures have wheels so they could be moved around. Use his work to inspire your creation!
-
Here's what to do:
-

What you need
• 4 felt-tip pens
• Sticky tape or double sided tape
• Electrical tape or parcel tape
• 1-2 sheets of corrugated cardboard or an old cardboard box
• 1 pencil
• 1 pair of scissors
• 1.5–3 volt small DC motor (with or without a cog)
• A switched battery box with leads, that holds 2 AAA batteries
• 2 AAA batteries
• A few different weights for your motor (try a 5p coin, a wooden lollipop stick or a small plastic toy)Electrical components available from Maplin and other good electrical stores.
-
1. Cut out two triangles
Take a sheet of cardboard. Draw and cut out two equally-sized triangles, with all the sides of the same length. Use the template here to guide you.
-
2. Slot the triangles together
On one triangle, cut a slot at the mid point along one side – cut a slot from the bottom of the triangle towards the point, cutting about half way up. On the other triangle, cut from the point of the triangle to about half way down. Slot the two triangle pieces together. This will form the base of your sculpture.
-


-
-
3. Add more shapes to your sculpture
Draw and cut out some shapes using the rest of the cardboard, inspired by David Smith’s sculptures. Try triangles, square frames or circles. Be as creative as you can! Attach these shapes to your sculpture base using glue, tape or by cutting slots.
-
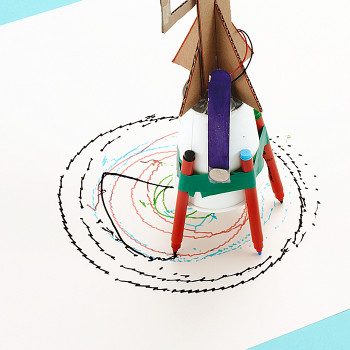
4. Attach the felt-tips to the cup
Turn your paper cup upside-down so the base is in the air. Attach four felt-tip pens (with the tips facing down) to the outside edge of your cup at equal points, using separate pieces of sticky tape.
Make sure all the pens are at the same height so that the cup can stand up and is stable. Position them so that they start halfway down the cup. Try to make sure you get the pens in the right position, as you will have to reinforce with more tape later.
-
5. Attach your sculpture to the cup
Using sticky tape, attach your sculpture securely to the top of your cup, so the pens are holding up the sculpture-bot. Make sure that the pens are secure by adding a new piece of tape that goes all the way around.
-


-
-
6. Connect the motor to the battery pack
Now, take the battery pack and hook the metal tip of the black negative wire to one side of the connector on the motor. Repeat with the red positive wire to the opposite connector and twist it. Make sure the wires are securely attached to each side of the connector.
Use electrical tape or sellotape to ensure that the metal parts stay connected when the robot moves. The metal part of the wire must touch the metal connector on the motor to allow the electric current to flow. Then, place the batteries in the battery pack, turn it on and test that the motor works.
Warning: Be careful not to attach the two wires to the same side of the motor as this will cause your batteries to overheat.
-
7. Attach your battery and motor
Attach the battery pack to one side of your sculpture-bot using electrical, sticky or double-sided tape. Securely attach your motor the top of the cup, on the opposite side to the battery pack. The rotating pin on the motor should face outwards, and stick out more than the sculpture.
Make sure there is plenty of room around the pin of your motor, ready for when you attach a weight. It shouldn’t hit the top of your sculpture, or come into contact with anything else when it spins. Check the wires are still securely connected to your motor. If necessary, add more tape!
-
8. Attach a weight to the motor
Start by using a 5p coin as your weight. If your motor has a cog provided, put the cog on the end of the pin. Fix your 5p coin on one end of the lollipop stick. Then fix the lollipop to the cog. Make sure it is secure.
If your motor doesn’t have a wheel, to add a weight, cut a thin strip of electrical or sticky tape and loop this around the pin of the motor, and seal it firmly. It should be well fixed, so that when the motor spins, it stays attached. Attach the 5p coin as your weight by sticking it to the tape flap with some more tape.
Warning: Be careful when you are attaching weights to the motor as they could loosen and cause injury if you don’t fasten them securely.
-


-
-
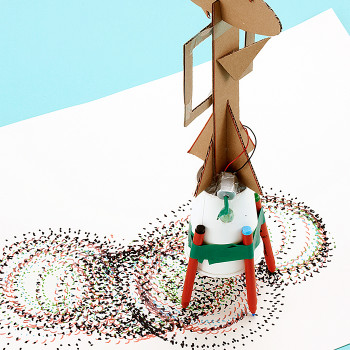
9. Get ready to draw
Place your drawing sculpture-bot on a big piece of paper. If you don’t have a very big piece of paper, it might be a good idea to put newspaper under the paper in case sculpture-bot goes over the edges. Remove the lids from the felt-tips and position your sculpture-bot in the centre of the paper.
-
10. Watch the sculpture-bot draw
Switch the battery pack on and watch the sculpture-bot create a drawing!
-
11. Experiment!
Experiment with adding different weights of different sizes to your motor, using tape. See what differences there are in the marks it makes. You can even try changing the pens, as the colours and thicknesses will change how your finished drawing looks.
-

-
How did you do? Share a photo of your finished robot or its artwork with @royalacademy on Twitter or @royalacademyarts on Instagram.
-
Photography by Simon Pask Photography
Activity by Kay Harwood
Find out about our Family Studio events.
-
Gallery: making robots at our Family Studio event
Make:Shift:Draw Family Studio, October 2016
Make:Shift:Draw Family Studio, October 2016
Make:Shift:Draw Family Studio, October 2016
Make:Shift:Draw Family Studio, October 2016


-
-
Families visiting the RA
From free drop-in workshops to our fun and engaging Art Detective trails, and galleries full of colourful paintings and sculptures to explore, families are welcome at the RA – and kids under 16 go free to all our exhibitions.
-

Read more
-
Artists
> 1 year ago
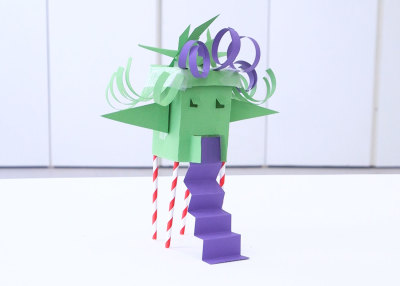
How to: make a character house
Instead of throwing cereal containers and milk cartons away, use them to make a miniature house with character.
-
Artists
< 2 years ago
How to: paint with words like Patrick Moses
Try making a painting inspired by words like Summer Exhibition 2021 artist Patrick Moses.
-
Artists
> 2 years ago
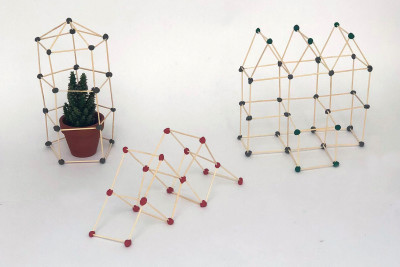
How to: design a greenhouse
Experiment with making miniature architectural models using just toothpicks and plasticine.
-
Artists
> 2 years ago
How to: make tempera paint
Have a go at making your own paint with eggs, make-up, spices and chalk.

