Family how-to: felt-tip printing
Family how-to: felt-tip printing
By Lily McGuire and Wes Gilpin
Published 17 November 2020
Make your own unique and colourful prints using felt-tip pens and an old baking dish.
-
How to: felt-tip printing
Dish up a monoprint
Each year the Summer Exhibition has a room dedicated to prints — showcasing an array of ideas and techniques from etching to lithography and screenprinting.
Monoprints are made in a variety of ways, sometimes involving drawing or painting directly onto a printing plate. They can be quick to make, spontaneous and experimental, but unlike other methods, each print can only be made once.
Check out this years selection of prints to see what might inspire your own creations.
-
-

What you need
• Felt-tip pens
• Sponge
• Cloth
• Paper
• Dish
• Tray
-

-
-
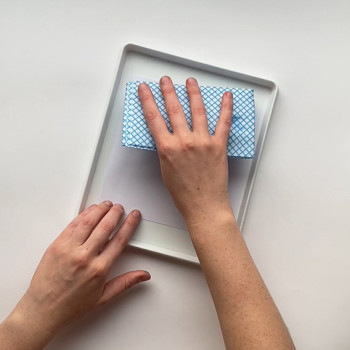
Step 1
Draw onto your dish using felt-tip pens.
-
Step 2
Using a damp cloth, thoroughly wet your printing paper.
-
Step 3
Absorb any excess water using a dry cloth.
-


-
-
Step 4
Place the wet side of your paper down onto your drawing. Then apply even pressure across its surface to make sure the ink transfers.
-
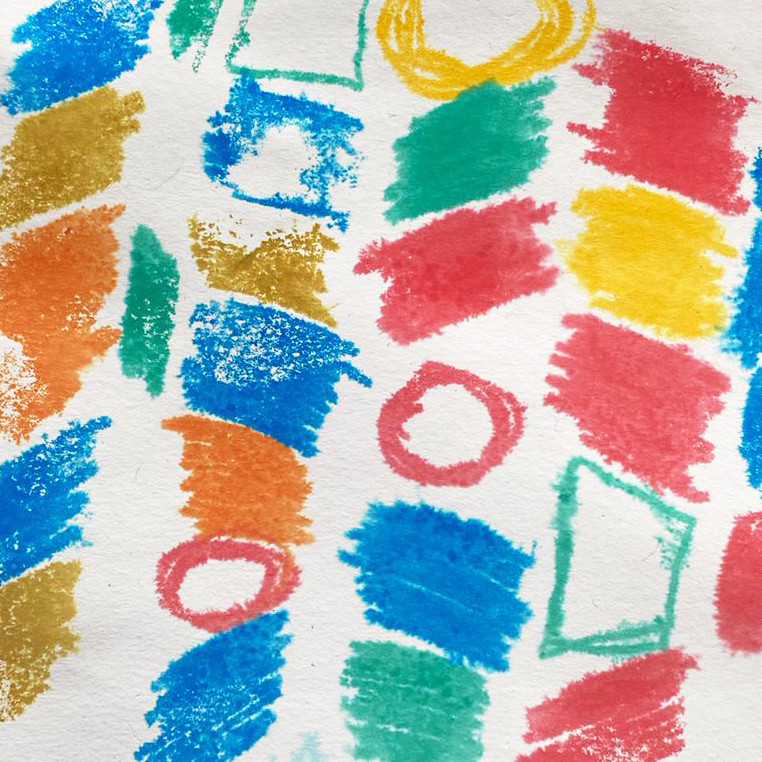
Step 5
Peel away your print and leave it to dry.
-
Step 6
Check out your work!
-


-
Show us your prints! Share a photo of your finished work with @royalacademy on Twitter or @royalacademyarts on Instagram, using #familyhowto.
-
-
Families at the RA
Whether it’s a free drop-in workshop or one of our fun and engaging Art Detective trails, the RA is brimming with colourful paintings and sculptures that are waiting to be explored. Everyone is welcome at the RA – and kids under 16 go free to all our exhibitions.
-

Read more
-
RA Exhibitions
1 month ago
Video: introducing ‘Entangled Pasts, 1768–now: Art, Colonialism and Change’
Artist Lubaina Himid RA talks to us about our next exhibition in the Main Galleries.
-
Artists
3 months ago
My sketchbook: colourful drawings by Bob and Roberta Smith RA
Take a look inside the sketchbook of Bob and Roberta Smith RA and learn how to create a visual poem.
-
Artists
3 months ago
Video: Catherine Opie on photographing leading British artists
Catherine Opie discusses her portraits of David Hockney, Anish Kapoor, Gillian Wearing, Isaac Julien and Lynette Yiadom-Boakye, featured in our free display in the Collection Gallery.
-
Inside the Academy
3 months ago
Video: new posters on display
Watch our team refresh our iconic Poster Bar for the first time since 2018, featuring 21 new posters from our past exhibitions.