Family how-to: plastic bag weaving
Family how-to: plastic bag weaving
By Lily McGuire and Tiffany Greenoak
Published 7 July 2020
Follow these simple instructions to make a mini loom and have a go at weaving with recycled plastic bags.
-
Family how-to: plastic bag weaving
Turning trash into treasure
Be inspired!
Ghanaian sculptor El Anatsui Hon RA makes large cloth-like installation pieces that reference African traditional craft techniques. He is interested in what we consume day-to-day and uses recycled materials such as aluminium packaging and bottle tops, transforming them into precious artworks.
As well as plastic bags, what other discarded materials could you use to create your weaving? Have a look around the house and get experimenting!
Tips for parents and carers
This activity involves knotting, threading and cutting thick cardboard. It is ideal for children aged 8+ and may require adult supervision. For younger children who are keen to have a go, it’s worth noting that the larger the loom and spaces between the warp strings, the less fiddly weaving will be for little fingers.
-
-

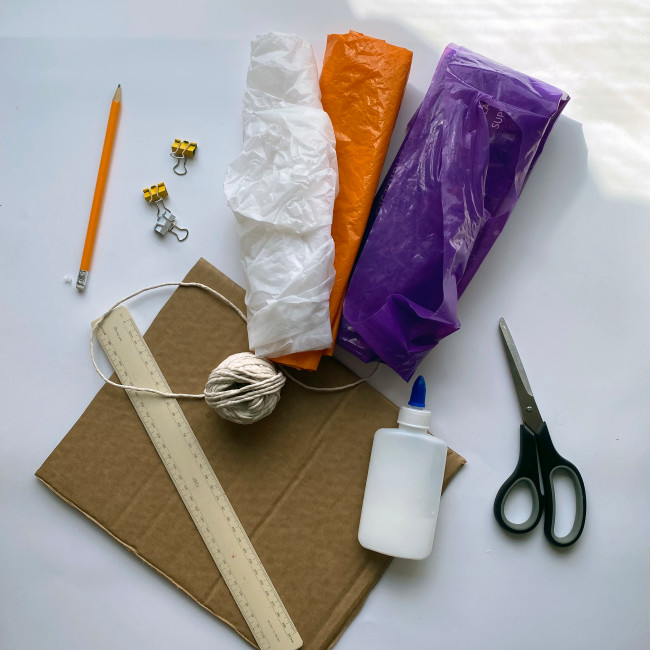
What you need
• Plastic bags
• Thick cardboard
• String
• Strong scissors
• Ruler
• Pencil
• PVA glue
• Bulldog clips
-
-
-
Step 1
Cut your cardboard into a rectangle. The larger the cardboard, the larger your weaving will be! Using a ruler (or a finger!) measure marks approximately 1 cm apart along the top and bottom. For younger ones, experiment with spacing these further apart.
-
Step 2
Cut along the lines with scissors.
-
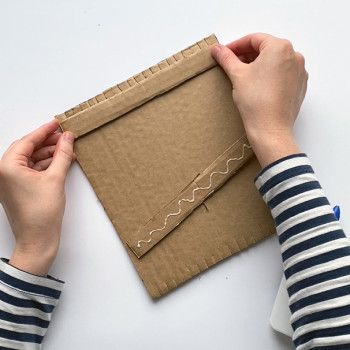
Step 3
Cut two thin strips of cardboard the width of the loom and glue them down.
-


-
-
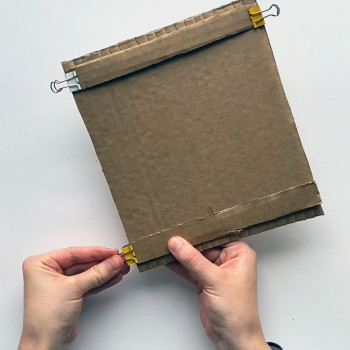
Step 4
Secure the cardboard strips with bulldog or paper clips until the glue dries.
-
Step 5
Unwind some string and tie a knot at one end.
-
Step 6
Securing the knotted end at the back, pull the string across the front of the loom, then back behind, and so on, to make rows of string. This is called the warp.
-


-
-
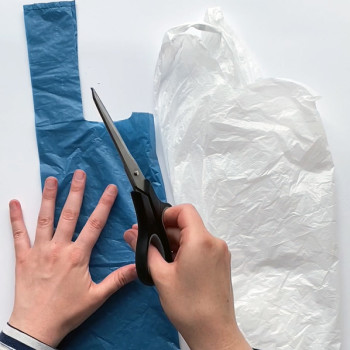
Step 7
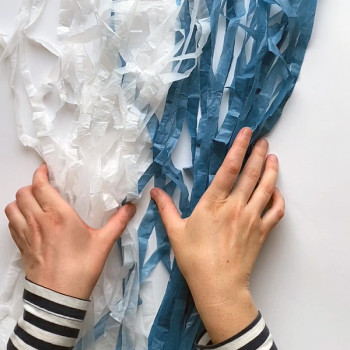
Choose your plastic bags, flatten them out and cut off their handles. You could try using a mixture of bags. The heavy duty, reusable ones will be easier to thread.
-
Step 8
Fold each bag into long, flat sausages.
-
Step 9
Cut each one into segments, discarding the ends. The wider you cut each segment, the wider your plastic thread will be.
-


-
-
Step 10
Unravel each one to make long plastic threads. You may need to trim off any extra bits and put aside threads that are not fully intact.
-
Step 11
Take one of your plastic threads and tie it onto a top corner of the warp, using a single knot. Be as gentle as possible here with more lightweight bags, to make sure the plastic thread doesn’t snap.
-
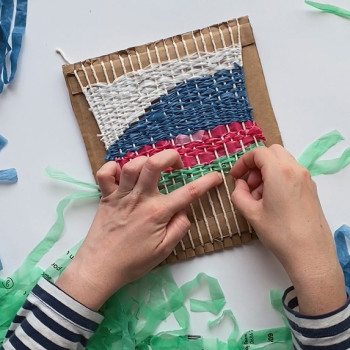
Step 12
Then begin to weave across the warp, holding onto the end of the thread and taking it over one string and under the next. You can weave the plastic thread all the way to the end of the loom, or turn back midway. When you turn back, take note of the thread above. If it goes over the warp, then take your thread under, if it goes under, then take yours over.
-

-
-
Step 13
When you reach the end of your strip, or want to change the colour of your thread, tie the end and cut off the excess. Experiment with different colours and patterns, creating shapes with your weaving.
-
Step 14
Turn your loom over, cut each string free and carefully pull your weaving away from the loom.
-
Step 15
To secure the weaving, tie knots in the string at each end.
-


-
Admire your work!

-
Show us your results! Share a photo or video of your finished work with @royalacademy on Twitter or @royalacademyarts on Instagram, using #familyhowto.
-
-
Families at the RA
Whether it’s a free drop-in workshop or one of our fun and engaging Art Detective trails, the RA is brimming with colourful paintings and sculptures that are waiting to be explored. Everyone is welcome at the RA – and kids under 16 go free to all our exhibitions.
-

-
Support the RA
An independent charity, we receive no revenue funding from the government. At this difficult time, we're reliant on the support of our Friends, visitors and online audiences. Thank you.
Read more
-
RA Exhibitions
1 month ago
Video: introducing ‘Entangled Pasts, 1768–now: Art, Colonialism and Change’
Artist Lubaina Himid RA talks to us about our next exhibition in the Main Galleries.
-
Artists
3 months ago
My sketchbook: colourful drawings by Bob and Roberta Smith RA
Take a look inside the sketchbook of Bob and Roberta Smith RA and learn how to create a visual poem.
-
Artists
3 months ago
Video: Catherine Opie on photographing leading British artists
Catherine Opie discusses her portraits of David Hockney, Anish Kapoor, Gillian Wearing, Isaac Julien and Lynette Yiadom-Boakye, featured in our free display in the Collection Gallery.
-
Inside the Academy
3 months ago
Video: new posters on display
Watch our team refresh our iconic Poster Bar for the first time since 2018, featuring 21 new posters from our past exhibitions.