Family how-to: make a relief print
Family how-to: make a relief print
By RA Learning
Published 7 April 2017
Inspired by the London Original Print Fair, here’s how to scribble, scratch and carve your design into a piece of polystyrene to make a relief print like a pro!
-
In this activity you will carve your design into a piece of polystyrene, using a blunt pencil or any other tool you like. Once you’ve made a printing block, you can print with it over and over again, making multiple pieces of art.
What is a relief print?
Relief printing is when you carve into a printing block that you then use to press onto paper and make a print. The lines or shapes you carve into the printing block will not have ink on them, so will not show up on your paper. Instead, the print will reveal the parts you don’t draw, because they come into contact with the ink. The print will be a mirror image of what you see on your printing block!
Extra inspiration!
The London Original Print Fair is an annual fair full of prints of all different types. Have a look at a gallery of some prints from this year’s fair to get some ideas. The London Original Print Fair is at the RA from 4–7 May 2017.
-
Here's what to do:
-

What you need
• Polystyrene – some pizza bases, plates or containers made of polystyrene. You can also buy polystyrene blocks or rolls.
• Water-based printing ink (or you could water down acrylic paint, but this won’t give you as good a result). High contrast colours work best!
• An apron.
• Something to roll the paint or ink onto – a paint tray, a flat, plastic board, a piece of cardboard or a glass tile.
• Something pointy (but not too sharp) to carve into the polystyrene – a blunt pencil, a knitting needle, a ballpoint pen with a lid on it, or the end of a paintbrush.
• A rubber roller
• Paper or card – the flatter it is, the better.
• Rolling pin or spoon (to press the print down with).
• Newspaper to cover your work area.
• A roll of greaseproof paper.
-
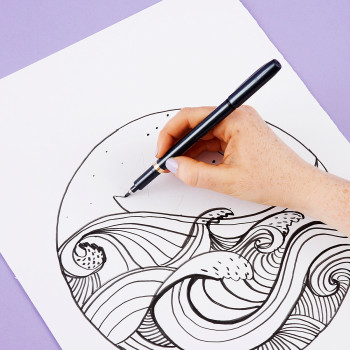
1. Sketch your design
Make some sketches of the print you’d like to make on paper.
Lines will work well carved into the polystyrene. As you sketch your design, think about how you could incorporate a mix of lines and patterns, using different tools.
Two things to remember: 1. Your print will be a mirror image of what you see on the printing block 2. The parts you press down will not be inked, so will be the colour of the paper on your final print.
-
2. Prep your polystyrene
Give your polystyrene a good wash if it’s recycled.
Next, if you are using a tray or takeaway tray, make your polystyrene flat by cutting off any edges that are sticking out.
Cut your polystyrene, the printing “block”, to the shape you want to have for your print.
Think about your edges – make them smooth, or just be aware of how they will print.
-


-
-
3. Press into your block using your tools
Different tools will make different marks.
Before you start, you might want to practise on some spare polystyrene and look at how the different tools work.
If you make some lines deeper and some slightly shallower, your print will show the variation. Test the resistance of the block. Keep stepping back and looking at the overall design.
-
4. Get your ink ready
Once you are happy with your design, prep your work area, covering it in newspaper.
Squeeze a thin line of ink into the tray.
Make sure there’s not too much: you only need enough to cover the roller in a thin, even way.
Roll the ink out, using your roller. Keep rolling until the ink is evenly and thinly spread all over your roller.
-
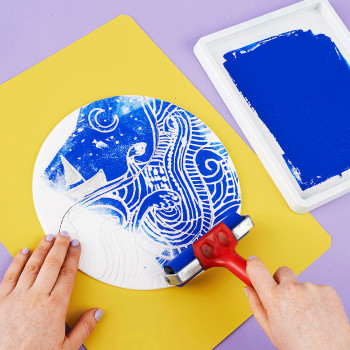
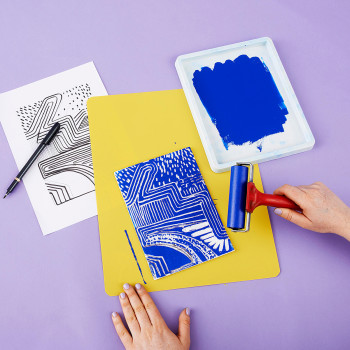
5. Apply ink to the block
Then, gently roll the ink onto the block using the ink-covered roller.
Cover the block all the way to the edges, rolling the ink back and forth gently over the block.
Add more ink if needed to get an even coat of ink. You’ll start to see where the ink is going to go once it’s printed.
-


-
-
6. Place the block onto the paper
Carefully place the block in the centre of the page. Try not to move it once you’ve pressed it down.
-
7. Press the block down
Take your greaseproof paper and lay it on top of the block and on top of the paper.
Use a rolling pin to press the block down. You will need to press quite hard and make sure the pressure you apply is even. Get a grown up to help!
-
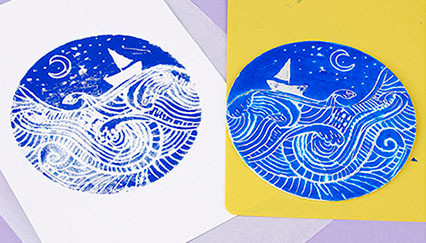
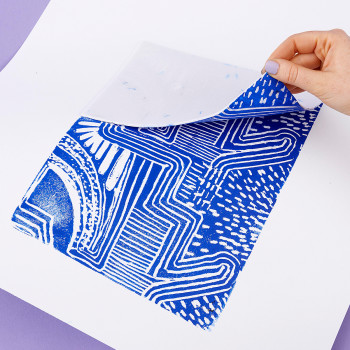
8. Peel off the paper to reveal your print
Peel the paper off the block, ensuring you do so slowly, so it won’t smudge or wrinkle the print.
-


-
-
Your print is a mirror image of your initial design!
When you put them side by side, notice how the design is now back to front.
-
-
More ideas to try...
-
Make multiples!
Add some more ink to your roller, as before, and ink the block up again.
Make sure you cover it evenly, with enough ink. It will be harder to see where the ink is this time, as the block will still be coloured from your last print.
-
Try another design
If you want to, have another go with a more abstract design.
You can try and line up the design so if you do more than one on the same sheet of paper, it will connect into one big pattern.
-
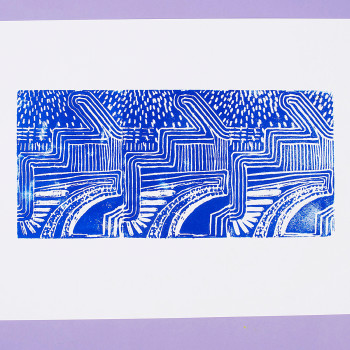
Create multiples on the same piece of paper
Get a sheet big enough to do two, three or four prints all in a row and line the edges up carefully.
-
-
-
Your patterned print
If you line up the design in the same big print, you will get a result something like this! Your pattern can be as abstract as you like.
-
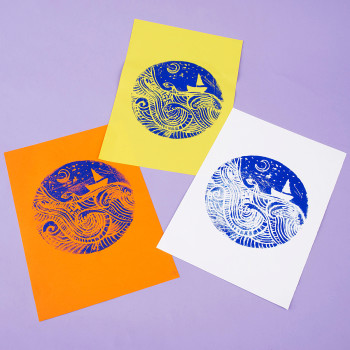
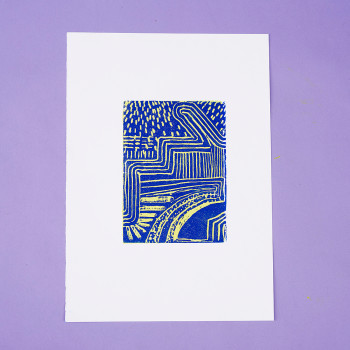
Try something new with colour
Try printing a solid shape using a new piece of polystyrene, and use that as a background.
Choosing two highly-contrasting colours will give the best effect.
-
Keep experimenting!
You can keep experimenting with different coloured paper backgrounds, different coloured inks, and new designs. Each time you print using your block, you are creating a new artwork. You can use your block to print all sorts of things, like cards, wrapping paper or even on fabric!
-

-
-
Adapt your pen or pencil
Need to make this Family how-to more accessible? Learn how to adapt your pen to make it longer or easier to grip.
-

-
Show us your prints! Share a photo of your finished prints with @royalacademy on Twitter or @royalacademyarts on Instagram using #familyhowto
-
Photography by Simon Pask Photography
-
-
Families visiting the RA
Whether it’s a free drop-in workshop or one of our fun and engaging Art Detective trails, the RA is brimming with colourful paintings and sculptures that are waiting to be explored. Everyone is welcome here – and kids under 16 go free to all our exhibitions.
-

Read more
-
Artists
> 1 year ago
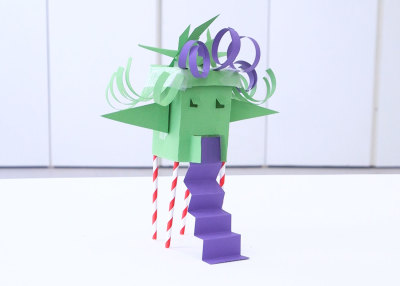
How to: make a character house
Instead of throwing cereal containers and milk cartons away, use them to make a miniature house with character.
-
Artists
< 2 years ago
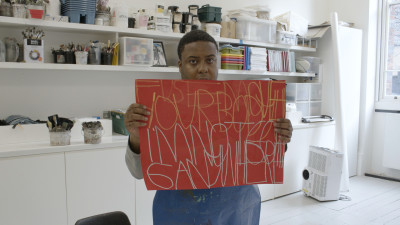
How to: paint with words like Patrick Moses
Try making a painting inspired by words like Summer Exhibition 2021 artist Patrick Moses.
-
Artists
> 2 years ago
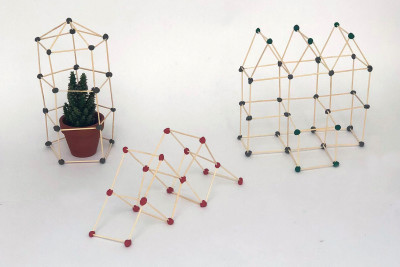
How to: design a greenhouse
Experiment with making miniature architectural models using just toothpicks and plasticine.
-
Artists
> 2 years ago
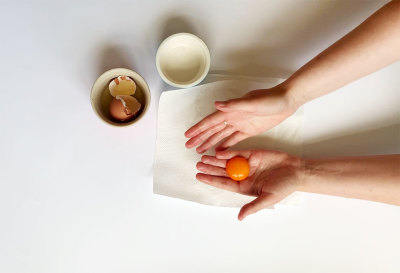
How to: make tempera paint
Have a go at making your own paint with eggs, make-up, spices and chalk.