Family how-to: make a Christmas cookie cutter print
Family how-to: make a Christmas cookie cutter print
By RA Learning
Published 15 December 2018
Why not put your stamp on the festive season with our cookie cutter Christmas prints and Funky Foam reliefs?
-
-

What is a relief print?
This is when you carve into or add relief to a printing block, which you then use to press onto paper and make a print.
Grab a cookie cutter and press it into the printing block. The lines created by the cookie cutter will not show up on your paper, and instead, the print will reveal the parts you haven’t pressed. This is because the lines didn’t come into contact with the ink.
You can also add relief to your block with some Funky Foam sheets. The areas where you stick foam will soak up the ink and show up clearly on your print.
-

-
Try making a gingerbread man print
-
What you need
• Polystyrene – try a pizza base, plate or container made of polystyrene. You can also buy polystyrene blocks or rolls.
• Water-based printing ink (or you could water down acrylic paint, but this won’t give you as good a result). High contrast colours work best!
• Something to roll the paint or ink onto – a paint tray, a flat, plastic board, a piece of cardboard or a glass tile.
• A cookie cutter or two. If you want to be festive, try a tree, gingerbread man, star or snowflake.
• A rubber roller.
• Decorations like buttons, stickers or glitter glue.
• Greaseproof paper for protecting your work surface.
• Paper or card.
• An apron.
-
1. Make your marks using cookie cutters
Choose which cookie cutter you are going to use.
Place it on your polystyrene block where you want the line to go and press down firmly.
You may need to go over the line with a pencil if it hasn’t made a deep enough indentation.
-
2. Ink up your polystyrene block
Squeeze a small amount of ink into your tray.
Make sure there’s not too much: you only need enough to cover the roller in a thin, even way. Roll the ink out until it is evenly and thinly spread all over your roller.
Then, start transferring the ink onto your polystyrene block. The ink should not be thick enough to seep into the cookie cutter indentation. Instead, those lines should remain white.
-


-
-
3. Reveal your print
After pressing down firmly with a spoon, clean rolling pin or rubber roller, carefully peel back your paper to reveal the print.
-
4. Add some decoration!
Next, add some buttons and a smile using stickers or glitter glue.
-
5. Hang it up to dry or give your print as a gift!
Want to try another cookie cutter? Read on to see more ideas.
-


-
Make a flurry of snowflakes
-
1. Make your marks using cookie cutters
Make marks in the polystyrene by pressing down firmly with your cookie cutter.
You can layer the snowflakes by marking the polystyrene multiple times.
-
2. Ink up your polystyrene block
Roll out your ink in the ink tray.
Then, use your roller to transfer the ink onto your printing block. Make sure it’s nice and even and not too thick.
-
3. Peel back to reveal your print
You can peel back the paper or polystyrene block to reveal your relief print!
-


-
Cut out funky foam shapes to make a different type of relief print
-
What you need
• Polystyrene – a pizza base, plate or container made of polystyrene. You can also buy polystyrene blocks or rolls.
• Water-based printing ink (or you could water down acrylic paint, but this won’t give you as good a result). High contrast colours work best!
• Something to roll the paint or ink onto – a paint tray, a flat, plastic board, a piece of cardboard or a glass tile.
• A piece or two of funky foam, with adhesive backing
• A rubber roller
• Paper or card
• A rolling pin
• Greaseproof paper
-
1. Cut out your shapes
This time, instead of pressing the cookie cutters into the polystyrene, cut out shapes with the foam.
You can make your shape by tracing a cookie cutter or you can draw freehand onto the foam.
Arrange your shapes and when you are happy with the composition, stick them down onto the polystyrene printing block.
The shapes will take the colour, and the polystyrene will not.
-
2. Ink up your printing block
Roll your ink out in the tray using the roller.
Once it is evenly spread, transfer the ink to the polystyrene block.
Greaseproof paper is useful to stop the ink getting on your work surface.
-


-
-
Reveal your print!
Peel back the printing block or the paper to reveal your print.
Try making another with a different set of shapes!
-

-
You can also try printing using an old rolling pin
-
1. Stick your shapes to the rolling pin
Think about how they will appear when you roll the pin across some paper.
You might want to cut out a longer shape that wraps around the pin, as well as some standalone shapes.
-
2. Use a brush to transfer your ink to the rolling pin
Instead of using a roller, use a brush to put the ink onto the pin.
You might want to roll the pin back and forth on some greaseproof paper before you print with it to get rid of any excess.
-
3. Roll the rolling pin onto some paper
You can make a long banner or a short design. Roll it further to lengthen the design – but you might run out of ink!
If you have to reapply ink, try to line up the rolling pin with the design you’ve already created.
-


-
Show us your prints! Share a photo of your finished prints with @royalacademy on Twitter or @royalacademyarts on Instagram using #familyhowto
Photography by Simon Pask Photography
Read more
-
Artists
> 1 year ago
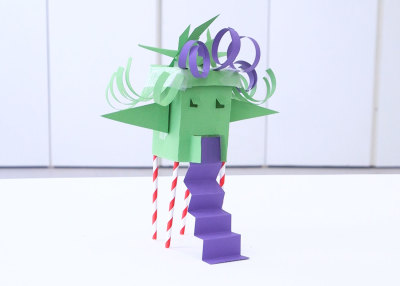
How to: make a character house
Instead of throwing cereal containers and milk cartons away, use them to make a miniature house with character.
-
Artists
< 2 years ago
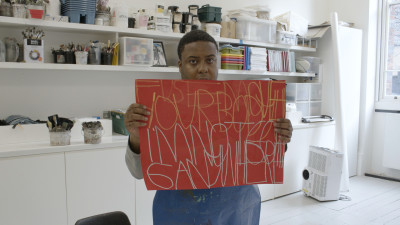
How to: paint with words like Patrick Moses
Try making a painting inspired by words like Summer Exhibition 2021 artist Patrick Moses.
-
Artists
> 2 years ago
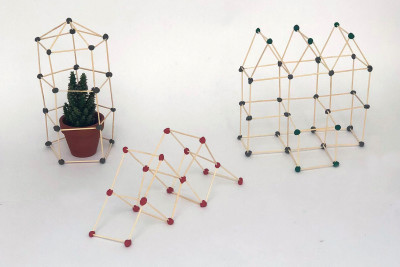
How to: design a greenhouse
Experiment with making miniature architectural models using just toothpicks and plasticine.
-
Artists
> 2 years ago
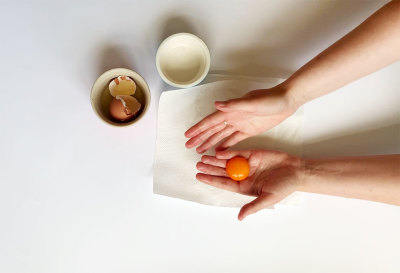
How to: make tempera paint
Have a go at making your own paint with eggs, make-up, spices and chalk.